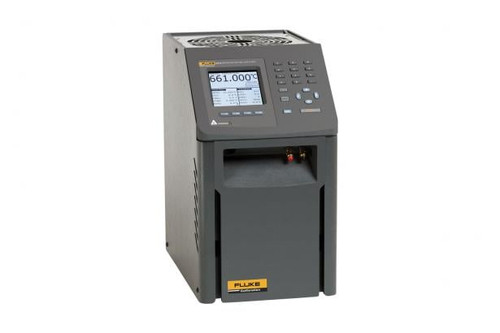
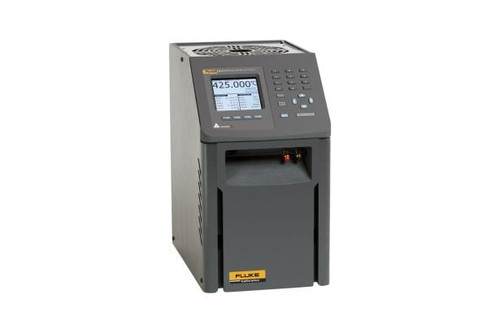
Accurate enough for lab use, and rugged and portable enough to take anywhere
- Best-performing industrial heat sources (accuracy, stability, uniformity) in the world
- Immersion depth to 203 mm (8 in)
- Optional ITS-90 reference input reads PRTs to ±0.006 ¡C
- Temperature range from Ð45 ¡C to 700 ¡C
Every once in a while, a new product comes around that changes the rules. It happened when we introduced handheld dry-wells. It happened when we introduced Micro-Baths. Now weÕve combined bath-level performance with dry-well functionality and legitimate reference thermometry to create Metrology Wells.
With groundbreaking new proprietary electronics from Fluke Calibration's (patents pending), Metrology Wells let you bring lab-quality performance into whatever field environment you might work in. New analog and digital control techniques provide stability as good as ±0.005 ¡C. And with dual-zone control, axial (or ÒverticalÓ) uniformity is as good as ±0.02 ¡C over a 60 mm (2.36 in) zone. (ThatÕs 60 mm!) Such performance doesnÕt exist anywhere else outside of fluid baths.
In short, there are six critical components of performance in an industrial heat source (which the European metrology community explains, for example, in the document EA-10/13): calibrated display accuracy, stability, axial (vertical) uniformity, radial (well-to-well) uniformity, impact from loading, and hysteresis. We added a seventh in the form of a legitimate reference thermometer input and created an entirely new product category: Metrology Wells.
(By the way, Metrology Wells are the only products on the market supported by published specifications addressing every performance category in the EA-10/13. Our specs arenÕt just hopes or guidelines. They apply to every Metrology Well we sell.)
Key features
Display accuracy
Dry-wells are typically calibrated by inserting a calibrated PRT into one of the wells and making adjustments to the calibratorÕs internal control sensor based on the readings from the PRT. This has limited value because the unique characteristics of the reference PRT, which essentially become Òcalibrated intoÓ the calibrator, are often quite different from the thermometers tested by the calibrator. This is complicated by the presence of significant thermal gradients in the block and inadequate sensor immersion into blocks that are simply too short.
Metrology Wells are different. Temperature gradients, loading effects, and hysteresis have been minimized to make the calibration of the display much more meaningful. We use only traceable, accredited PRTs to calibrate Metrology Wells and our proprietary electronics consistently demonstrate repeatable accuracy more than ten times better than our specs, which range from ±0.1 ¡C at the most commonly used temperatures to ±0.25 ¡C at 661 ¡C.
An application note is available to help better understand the uncertainties mentioned above.
For even better accuracy, Metrology Wells may be ordered with built-in electronics for reading external PRTs with ITS-90 characterizations. (See sidebar, Built in Reference Thermometry)
Stability
Heat sources from Fluke Calibration have long been known as the most stable heat sources in the world. It only gets better with Metrology Wells. Both low-temperature units (Models 9170 and 9171) are stable to ±0.005 ¡C over their full range. Even the 700 ¡C unit (Model 9173) achieves stability of ±0.03 ¡C. Better stability can only be found in fluid baths and primary fixed-point devices. The Òoff-the-shelf controllersÓ used by most dry-well manufacturers simply canÕt provide this level of performance.
Axial uniformity
The EA-10/13 document suggests that dry-wells should include a zone of maximum temperature homogeneity, which extends for 40 mm (1.54 in), usually at the bottom of a well. Metrology Wells, however, combine our unique electronics with dual-zone control and more well depth than is found in dry-wells to provide homogeneous zones over 60 mm (2.36 in). Vertical gradients in these zones range from ±0.02 ¡C at 0 ¡C to ±0.4 ¡C at 700 ¡C.
WhatÕs more, Metrology Wells actually have these specifications published for each unit, and we stand by them.
Radial uniformity
Radial uniformity is the difference in temperature between one well and another well. For poorly designed heat sources, or when large-diameter probes are used, these differences can be very large. For Metrology Wells, we define our specification as the largest temperature difference between the vertically homogeneous zones of any two wells that are each 6.4 mm (0.25 in) in diameter or smaller. The cold units (9170 and 9171) provide radial uniformity of ±0.01 ¡C and the hot units (9172 and 9173) range from ±0.01 ¡C to ±0.04 ¡C (at 700 ¡C).
Loading
Loading is defined as the change in temperature sensed by a reference thermometer inserted into the bottom of a well after the rest of the wells are filled with thermometers, too.
For Metrology Wells, loading effects are minimized for the same reasons that axial gradients are minimized. We use deeper wells than found in dry-wells. And we utilize proprietary dual-zone controls. Loading effects are as minimal as ±0.005 ¡C in the cold units.
Hysteresis
Thermal hysteresis exists far more in internal control sensors than in good-quality reference PRTs. It is evidenced by the difference in two external measurements of the same set-point temperature when that temperature is approached from two different directions (hotter or colder) and is usually largest at the midpoint of a heat sourceÕs temperature range. It exists because control sensors are typically designed for ruggedness and do not have the Òstrain freeÓ design characteristics of SPRTs, or even most PRTs. For Metrology Wells, hysteresis effects range from 0.025 ¡C to 0.07 ¡C.
Immersion depth
Immersion depth matters. Not only does it help minimize axial gradient and loading effects, it helps address the unique immersion characteristics of each thermometer tested in the heat source. Those characteristics include the location and size of the actual sensor within the probe, the width and thermal mass of the probe, and the lead wires used to connect the sensor to the outside world. Metrology Wells feature well depths of 203 mm (8 in) in the Models 9171, 9172, and 9173. The Model 9170 is 160 mm (6.3 in) deep to facilitate temperature of Ð45 ¡C.
Other great features
A large LCD display, numeric keypad, and on-screen menus make use of Metrology Wells simple and intuitive. The display shows the block temperature, built-in reference thermometer temperature, cutout temperature, stability criteria, and ramp rate. The user interface can be configured to display in English, French, or Chinese.
All four models come with an RS-232 serial interface and the Model 9930, Interface-it software. All are also compatible with Model 9938 MET/TEMP II software for completely automated calibrations of RTDs, thermocouples, and thermistors.
Even without a PC, Metrology Wells have four different preprogrammed calibration tasks that allow up to eight temperature set points with Òramp and soakÓ times between each. There is an automated Òswitch testÓ protocol that zeros in on the Òdead-bandÓ for thermal switches. And a dedicated ¡C/ ¡F button allows for easy switching of temperature units.
Any of six standard inserts may be ordered with each unit, accommodating a variety of metric- and imperial-sized probe diameters. (See inset at right. Download the complete data sheet to view details.) And Metrology Wells are small enough and light enough to go anywhere.
9170
The Model 9170 achieves the lowest temperatures of the series, reaching Ð45 ¡C in normal room conditions. The 9170 is stable to ±0.005 ¡C over its full temperature range (up to 140 ¡C) and has 160 mm (6.3 in) of immersion depth. With axial uniformity of ±0.02 ¡C and radial uniformity of ±0.01 ¡C, this model delivers exceptional uncertainty budgets and is perfect for a variety of pharmaceutical and other applications.
| Specifications | |||
| Range (at 23¡C ambient) | Ð45¡C to 140¡C (Ð49¡F to 284¡F) | ||
| Display accuracy | ±0.1¡C full range | ||
| Stability | ±0.005¡C full range | ||
| Axial uniformity | ±0.1¡C at Ð45¡C ±0.04¡C at Ð35¡C ±0.02¡C at 0¡C ±0.07¡C at 140¡C | ||
| Radial uniformity | ±0.01¡C full range | ||
| Loading effect (with a 6.35 mm reference probe and three 6.35 mm probes) | ±0.02¡C at Ð45¡C ±0.005¡C at Ð35¡C ±0.01¡C at 140¡C | ||
| Hysteresis | 0.025¡C | ||
| Well depth | 160 mm (6.3 in) | ||
| Resolution | 0.001¡C | ||
| Display | LCD, ¡C or ¡F, user-selectable | ||
| Key pad | Ten key with decimal and ± button. Function keys, menu key, and ¡C / ¡F key. | ||
| Cooling time | 44 min: 23¡C to Ð45¡C 19 min: 23¡C to Ð30¡C 19 min: 140¡C to 23¡C | ||
| Heating time | 32 min: 23¡C to 140¡C 45 min: Ð45¡C to 140¡C | ||
| Size (H x W x D) | 366 x 203 x 323 mm (14.4 x 8 x 12.7 in) | ||
| Weight | 14.2 kg (31.5 lb) | ||
| Power | 115 V AC (±10%), or 230 V AC (±10%), 50/60 Hz, 550 W | ||
| Computer interface | RS-232 Interface with 9930 Interface-it control software included | ||
| Traceable calibration (NIST) | Data at Ð45¡C, 0¡C, 50¡C, 100¡C, and 140¡C | ||
| Specifications | Built-in Reference Input | ||
| Temperature range | Ð200¡C to 962¡C (Ð328¡F to 1764¡F) | ||
| Resistance range | 0 ½ to 400 ½, auto-ranging | ||
| Characterizations | ITS-90 subranges 4, 6, 7, 8, 9, 10, and 11 Callendar-Van Dusen (CVD): R0, a, b, d | ||
| Resistance accuracy | 0 ½ to 20 ½: 0.0005 W 20 ½ to 400 ½: 25 ppm | ||
| Temperature accuracy (does not include probe uncertainty) | 10 ½ PRTs: ±0.013¡C at 0¡C ±0.014¡C at 155¡C ±0.019¡C at 425¡C ±0.028¡C at 700¡C | 25 ½ and 100 ½ PRTs: ±0.005¡C at Ð100¡C ±0.007¡C at 0¡C ±0.011¡C at 155¡C ±0.013¡C at 225¡C ±0.019¡C at 425¡C ±0.027¡C at 661¡C | |
| Resistance resolution | 0 ½ to 20 ½: 0.0001 ½ 20 ½ to 400 ½: 0.001 ½ | ||
| Measurement period | 1 second | ||
| Probe connection | 4-wire with shield, 5-pin DIN connector | ||
| Calibration | NVLAP accredited (built-in reference input only), NIST-traceable calibration provided | ||


